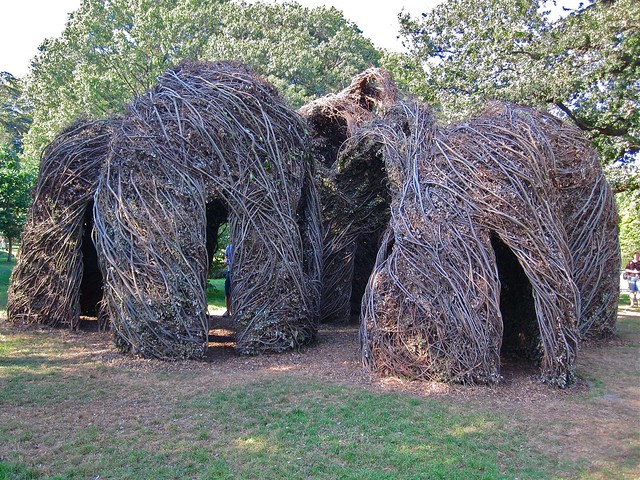
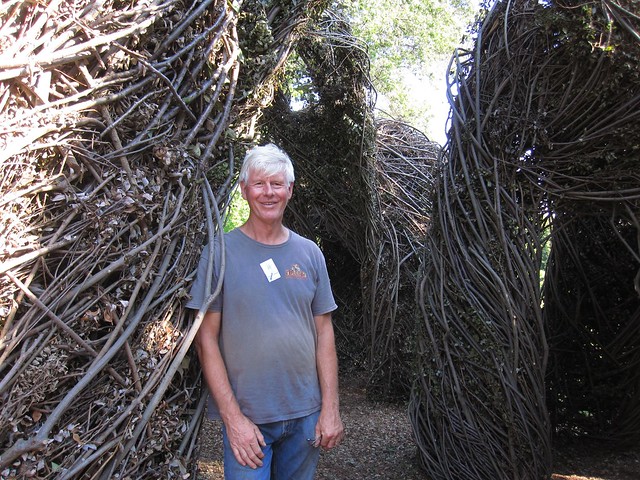
DC Greens has put together an amazing garden and outdoor classroom at the Stoddert Elementary School in Glover Park, DC. Having seen Patrick Dougherty's sculptures, Natural History (Brooklyn Botanic) and Easy Rider (Dumbarton Oaks), they knew they wanted a stick sculpture for the entryway to their Garden. Patrick Dougherty is generally booked for about two years in advance, so offered me the opportunity and honor to stand in and make a sculpture in his place. As with all of these sculptures, it takes a crew, and for every step along the way there was help. From the first day, harvesting material in Maryland, to the last sponsored meal at Whole Foods, there were volunteers eager to lend a hand in every way. Here is a blog for the garden and photos of the construction process of the sculpture. Special thanks to Patrick Dougherty, Sarah Bernardi, Lauren Shweder Biel, and Jim Coleman, for allowing me to take saplings from his woods.
I was presented with a problem: a clutter and a TV/DVD setup that was hard to access. I came up with this new design as a solution. This is the first build I have done where the wood and glass are inset into square tubing versus lying on top. The top level of each shelf is totally flush with the metal frame that supports it.
In need of a Keyboard case? This one went from trash to treasure. After checking out the store-bought options, this Frankenstein case seemed to be the best route. I found a discarded Peavey bass case and used a Dremel Rotozip to cut away the old foam, form fit for a bass guitar, to now fit the keyboard. I then lined the inside with fabric from Ikea's end-cut bin. Upon first use, the handle broke, so I fixed that too! When I had found it the brass/bolt configuration was already in play, but now it has a glue/tape job on the other side of the handle, and a peg/glue/staple job for the middle of the handle.
I was fortunate to take the course Textiles and Beyond taught by the Icelandic textile-genius, Hildur Bjarnadóttir. We learned all about working in wool and now, 8 years later, I had a relapse. I bought some felting needles and went to town mixing the raw wool fiber into a prefabbed army/navy store black wool scarf.
The patina on the TV stand built last year gave a great rusted finish, but it kept going, and it kept rusting and rusting. I went to its home in Carroll Gardens and CLR'ed it and then put a fresh coat of paste wax on top. The finish looks great, and has not rusted at all in months... fingers crossed.
Just finished building a Coffee Table for an eco/green dream house in Portola Valley. After working with Patrick Dougherty in February on a sculpture on the property, I contacted the homeowners with my website and they contacted me back saying they wanted me to build a coffee table for the house! I was then put in touch with BAMO, their interior designer, and the process started.
In general I use discarded materials as much as possible, but this project really pushed every aspect of the build to be as environmentally friendly as possible. I'm most comfortable working in metal, and after hunting high and low for suitable wood I was referred to Marcus Sims of Treincarnation who ended up doing a top notch job. From the samples he sent to BAMO they selected the Walnut Crotch. Due to the tapering nature of the cut to get at the crotch section of the tree I came up with the angular design of the boards to allow them to strech-out lengthwise, but still fill in the whole top section. I can't stress it enough, Marcus did an amazing job.
The basic design was borrowed from the Axe Bench that I made for Stonington SeamWorks. BAMO asked that it be smaller (46"x22") and for the gaps between the wood to be tighter, so it would be more suitable as a coffee table. Countless emails later we worked out all the details and the building commenced. It was a real education finding out how much petroleum has gotten into all the products we use, but there are a few companies out there that are really making a difference and using more natural ingredients.
It was a pleasure working with everyone involved!
Ingredients:
Top: Rescued Walnut Tree (saved from chipper at new housing development) finished with Tung Oil thinned with Citrus Oil.
Base: Reclaimed Angle Iron (taken from a fish tank stand outside a Chinese restaurant, a junked bedbug-less bed-frame, and scrap from the set of The Good Wife) finshed with Raw Linseed Oil and Beeswax.
Each time working with Patrick gets better than the last. Dumbarton Oaks has jaw-droppingly-beautiful gardens and Patrick's whirlwind design fit their ellipse garden perfectly. The Volunteers were top notch and Patrick ended up with an awesome sculpture.
Another great experience working with Patrick Dougherty, this time in my hometown. Struggling for a title we overheard a 5 year old say "This is Natural History" and the name stuck. I just returned from the woods of central Virginia, where we fought ticks, snakes, bees and poison ivy for our precious sticks for the next Sculpture at Dumbarton Oaks. Stay tuned!
Over the past few weeks I have had the pleasure of working with photographer Clay Patrick McBride, building props for his recent photo shoot with Zakk Wylde (founder of the band Black Label Society and former guitarist for Ozzy Osbourne). Clay asked me to build a rusted, “king of the underworld,” crown and scepter that Zakk Wylde would wear and hold while sitting on a thrown in a gothic castle. Clay and I met, went over some initial details and then we checked in throughout the process to make sure everything was on target. Everywhere I go my eyes are constantly scanning for unusual pieces of metal, and I had a stockpile of beat-up, rusted goodies that I was excited to incorporate into this project. Clay gave great pointers and was always open to bounce ideas off of. When it was all said and done I met up with everyone after shoot, met Zakk Wylde, and clay took this photo of us.
I built the scepter first. Clay had a handmade ceramic skull from a recent trip to Central America that he wanted suspended at the top. For the main shaft I used an old sign post that I had found in a seashore town which had heavy pits from all the salt. The post didn't have the taper that scepters commonly have in the handle so I had to expand the steel out towards the top and weld in spacers to keep the correct shape. The end of the post was totally disfigured by the rust, it looked great, but it was tricky to find a way to resolve the wild end to then make a place for the skull. I ended up using a twisted metal sphere to pull the rusted mess back together. The knob that originally had been at the top of the sign post I welded to the base and added a fence spike to make it all come to a point. I then biked around for scraps of rusted flat bar and barb wire to surround the skull. I welded bead lines and wrapped barb wire around the post to accent the handle of the shaft. After assembling it all, I topped it off with the Iron Cross from a Black Label Society logo.
The Crown required more fabrication from stock metals than the scepter. I used a cone calculator online to figure out the proper cut to make in a flat sheet of steel to create the base. It's weird holding a rainbow shaped piece of flat metal and hoping that the two ends will meet together and make a cone shape, but I put it in my ring roller and it did it! I cut a 10 degree cut into the square tube posts to make the crown start to become more vertical. Then I added fence spikes, also welded in at an angle, so they pointed straight up. To rust the stock metal I submerged it in a salty bath and gave it 50amps of juice with a car charge. I left it in there Electroetching for a couple hours and it came out with a good amount of red/orange rust as desired. At that point I didn't know exactly how far to take it, so before proceeding I contacted clay and he gave me some pointers and the go ahead for a totally raw, mean looking crown with thick chain and barb wire. When I tried it on the heavy crown had some painful pressure points against my dome so I tied in some rubber supports cut from a blown inner tube. This peeked my interest to do some research and I found one King's crown that weighed 75 lbs!

 DC Greens has put together an amazing garden and outdoor classroom at the Stoddert Elementary School in Glover Park, DC. Having seen Patrick Dougherty's sculptures, Natural History (Brooklyn Botanic) and Easy Rider (Dumbarton Oaks), they knew they wanted a stick sculpture for the entryway to their Garden. Patrick Dougherty is generally booked for about two years in advance, so offered me the opportunity and honor to stand in and make a sculpture in his place. As with all of these sculptures, it takes a crew, and for every step along the way there was help. From the first day, harvesting material in Maryland, to the last sponsored meal at Whole Foods, there were volunteers eager to lend a hand in every way. Here is a blog for the garden and photos of the construction process of the sculpture. Special thanks to Patrick Dougherty, Sarah Bernardi, Lauren Shweder Biel, and Jim Coleman, for allowing me to take saplings from his woods.
 I was presented with a problem: a clutter and a TV/DVD setup that was hard to access. I came up with this new design as a solution. This is the first build I have done where the wood and glass are inset into square tubing versus lying on top. The top level of each shelf is totally flush with the metal frame that supports it.


 Just finished building a Coffee Table for an eco/green dream house in Portola Valley. After working with Patrick Dougherty in February on a sculpture on the property, I contacted the homeowners with my website and they contacted me back saying they wanted me to build a coffee table for the house! I was then put in touch with BAMO, their interior designer, and the process started.



 Posts
Posts

